Introduction :
The Visual Studio Code (VS Code) is a lightweight but powerful source code editor which developed by Microsoft. Visual Studio Code is generally known as VS Code. It supports a wide range of programming languages such as C, C++, Java, C#, Html, PHP, Python etc. There are a wide range of features and extensions in VS Code.
VS Code is very popular code editor among developers because they can run code of various programming languages in it. It is very easy to use. It is very useful for new developers. If you want to code on VS Code, you have to install it on your pc. In this article, I shall show you the simple steps to install Visual Studio Code on the Windows operating system.
Step by step guide for installing VS Code :
Installing Visual Studio Code (VS Code) on Windows is a simple and straightforward process. You have to follow the below step by step process for installing Visual Studio Code (VS Code) on your pc (Windows operating system).
Step 1 :
At first, you have to open your favorite web browser on your pc. Then type “download vs code” in google search. Now, open the official website of Visual Studio Code. From here you can download VS Code installer file (VisualStudioSetup.exe) for Windows. The VS Code installer file (.exe) will be saved to your default location (generally the download folder).

Step 2 :
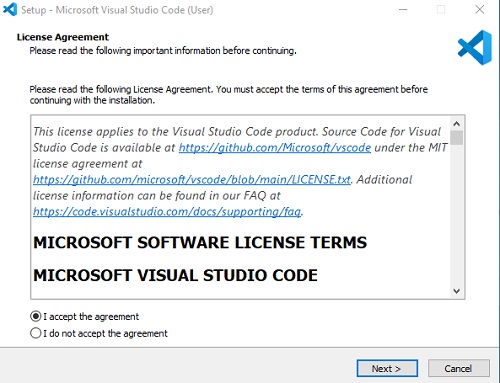
After download the installer file, double click on it to begin the installation process. Here, you may see a security warning. You have to click “Yes” for starting the installation. Then, the VS Code Setup Wizard will open on your pc. Now, you see the license agreement on the screen. You can read the license agreement. After that, click on the “I accept the agreement” checkbox and then click on the “Next” button.
Step 3 :
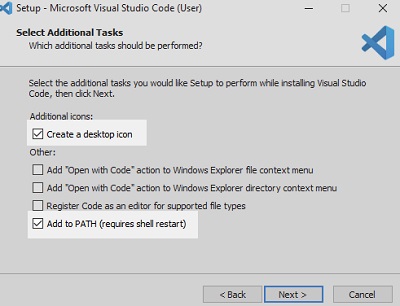
After accept the agreement, the installation will start. Here, you can customize the installation location, shortcuts and environment variable path. Normally, the default settings is best for most users. VS Code will be installed in the Program Files folder of “C” drive on your PC. Then, click on “Next” button.
Step 4 :
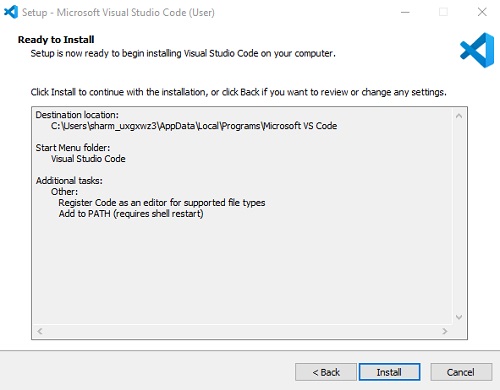
After selecting your preferences, you can see a review of the installation settings on the screen. Now, click on the “Install” button for installing Visual Studio Code on your PC (Windows).
Step 5 :
Now, you have to wait after click on “Install” button. Because, the installation process take some times to install the VS Code. It depends on your (PC) speed.

Step 6 :
Once the installation process finishes, you can see a confirmation message that Visual Studio Code has been successfully installed on your PC. Now, Click on the “Finish” button to close the Setup Wizard. After that, you can open Visual Studio Code (VS Code) on your windows PC.

Step 7 :
After open VS Code on your PC, you can customize it according to your need. You can install different types of extensions for your coding require. If you want to set up Visual Studio Code For C and C++ language, follow this link. You can run java program in Visual Studio Code. You can also run a python program in VS Code.
Conclusion :
After completing the above article, you have learned how to install VS Code in the Windows operating system. Thanks you for visiting my site.