Introduction :
Visual Studio Code (VS Code) is a popular and versatile code editor developed by Microsoft that supports a wide range of programming languages, including Java. Its lightweight, easy to use and numerous extensions make it a great choice for Java developers. Visual Studio Code provides a powerful and user-friendly environment for Java development. In this article, I shall show you the process of setting up and running a Java program in Visual Studio Code.
Steps to run java programs in the VS Code :
In this article, I shall explain the necessary steps of setting up and running Java programs in the Visual Studio Code.
Step 1 :
To run a Java program in Visual Studio Code (VS Code), you have to set up the necessary extensions and configurations properly. Before you start, make sure you have Java Development Kit (JDK) and Visual Studio Code (VS Code) installed on your pc. You need to have JDK installed on your pc to compile and run Java programs. If there is no Java Development Kit (JDK) installed on your system, you can download and install the latest version of the JDK from the official Oracle website or use an open-source alternative distribution like OpenJDK.
If you don’t have Visual Studio Code (VS Code) installed on your pc, you can download and install it from the official website of Visual Studio Code. You can also install VS Code on your pc by following my link.
Step 2 :
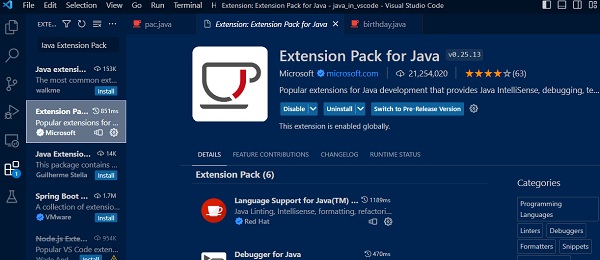
It is time to configure Visual Studio Code for Java development. To run Java programs in the Visual Studio Code, you have to install the “Java Extension Pack” extension. For this purpose, open or launch Visual Studio Code on your pc. Then, navigate to the Extensions view by clicking on the square icon on the sidebar or pressing Ctrl+Shift+X. Now, search for “Java Extension Pack”. Next, click the install button of Java Extension which provided by Microsoft. This extension pack for VS Code includes essential tools for Java development such as syntax highlighting, code completion, debugging, code formatting and more.
Step 3 :
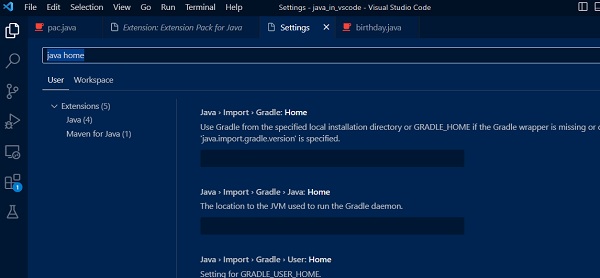
After installing the Java Extension Pack, you have to configure the path to your Java Development Kit (JDK). For that, open the settings or press “Ctrl + ,”. Then search for “java home” and set the path to the JDK installation directory of your pc. This step is crucial as it helps VS Code locate the Java compiler and runtime.
Step 4 :
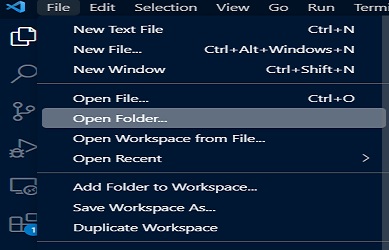
Once you have the Java Extension Pack installed, it’s time to set up your workspace. For this, create a new folder for your project or workspace such as “java_project”. This folder will contain all your Java files and resources. Now, go to the File menu. Select “Open Folder” and choose the project folder you just created. Your VS Code will open in your project folder.
Step 5 :
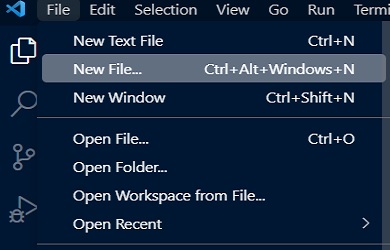
Inside the “java_project” folder, create a new Java file with a .java extension like “pac.java”. This will be your main Java source file.
Step 6 :
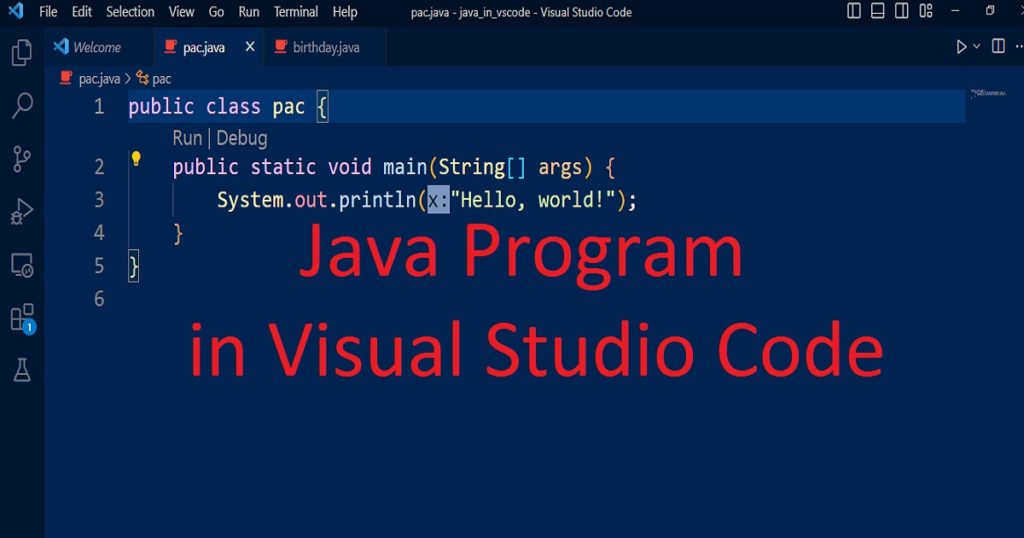
Open the “pac.java” file and write the following code in it and save the file. You have to write your main class name same as your file name.
public class pac {
    public static void main(String[] args) {
        System.out.println("Hello world!");
    }
}
Step 7 :
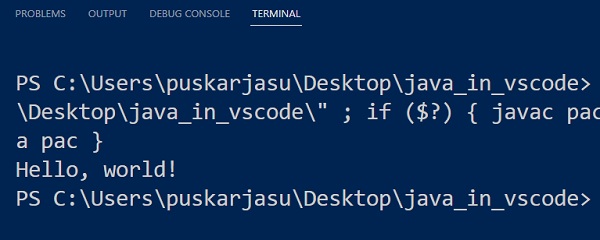
To compile and run the Java program, open the integrated terminal in the Visual Studio Code (Ctrl+`). Use the following commands to compile and run.
javac pac.java (for compile)
java pac (for run)

You can also right-click anywhere in the editor and select “Run Code” to compile and run the Java program.
There is a another method in the Visual Studio Code. You can click on the green “Run” arrow that appears above your main method to run the code.
Step 8 :
The output of your program will appear in the integrated terminal at the bottom of the Visual Studio Code (VS Code) window. Finally, You have successfully set up, write code and run a Java program in Visual Studio Code.
Conclusion :
After completing the above article, you have learned how you can set up, write, compile and run your Java programs smoothly within the Visual Studio Code (VS Code) interface. It is your starting point. You can learn more knowledge if you run more java program in VS Code. Thank you for visiting my site.